A full, step by step instruction on how to make this electrolysis tank will be available in the forum section of my website soon.
Since starting down my path of exploration in the axe world, I’ve been quite reluctant to breach the world of electrolytic cleaning. Until this weekend, my preference for rust removal on axe heads has been wire wheel and oil, and a good helping of elbow grease. Like many, I have also dabbled in the fine art of vinegar-based cleaning, and in all honesty, I do believe there is a use for vinegar, especially in full polish jobs and for severely pitted heads. However, with some down-time from my day job this 4th of July holiday weekend, I decided to see what I could do in the way of making an electrolysis tank.
Electrolysis at its simplest can be defined as using an electric current to drive an otherwise non-spontaneous reaction. In terms of our use in the axe world, electrolysis is a process by which a reaction caused by passing current through the axe as it bathes in an ionic solution results in the breakdown of the iron oxide, or rust, that has formed on the metal. The ionic solution that is typically used for rust removal of this sort is one of Sodium Carbonate (Washing Soda) dissolved in water. The Sodium Carbonate has dual purposes: it provides a strong ionic gradient by which the current can flow, as well as creating a basic solution that provided hydroxide ions to bond with other free ions in the system. The chemical reaction when the Sodium and Carbonate separate moves electrons from the rusty axe head to the steel cathode in the system breaking the oxide bond of the rust, “freeing” it from the iron and allowing it to be removed more easily.
The internet is full of designs and ideas for DIY electrolysis tanks, with quite few complete walk-through builds on Youtube. However, I’m not fond of the sloppy look of many of the builds, and though they seem to have perfectly acceptable results, I wanted something a little cleaner looking, with an ease of use as well as good functionality. Typically, the setups I’ve seen relied on a manual battery charger, a container of some sorts, often a bucket, and rebar. However, I went in a different direction, so I’ll list out what I used and explain the assembly and reasoning.
Materials:
12 Gallon Tote 24” x 6” 22 gauge steel sheets x 2 10-32 grounding screws (20) 10-32 nuts (20) Small washers (3) 3 ring terminals 2 offset terminal lugs 20 feet of 14-19 Primary wire 3/8” cable clamps 3 medium duty toggle switches 3 10 Amp battery clips 30” x 48” adjustable closet rod 12 volt Diehard Manual Battery Charger Arm and Hammer Super Washing Soda


The tank or bucket needs to be of adequate volume as to be able to hold the axe heads you’re looking to clean, and I work with everything from broadheads and turpentine boxing axes to hatchets, so the tank needed to be reasonable large. I also wanted to be able to do more than one head at a time, but didn’t want something so large it would be more than a cabinet top set up. To that end, I settled on a 12-gallon HDX Tough Tote. It measures in at about 16 inches wide by 21.6 inches long by 12.6 inches high.

Within the tote need to be an encircling cathode (or positive electrical node) for transmission from the axe heads to be clean. To this end, I used a straight edge to bend a 90-degree angle into each of the two sheets of steel so that they lined one long end and a part of each short end each. Noting that attaching these to the wall of the tote would result in screw holes where the solution would leak out of, I positioned the top edge of the sheets of metal about 2 inches bellow the lip of the tote. Small holes were drilled in the sheet metal and tote, and the metal was affixed using the 10-32 grounding screws and corresponding nuts. The ridges of the tote were a natural spot for this to occur, and a standard drill bit made short work of both the metal and the plastic.

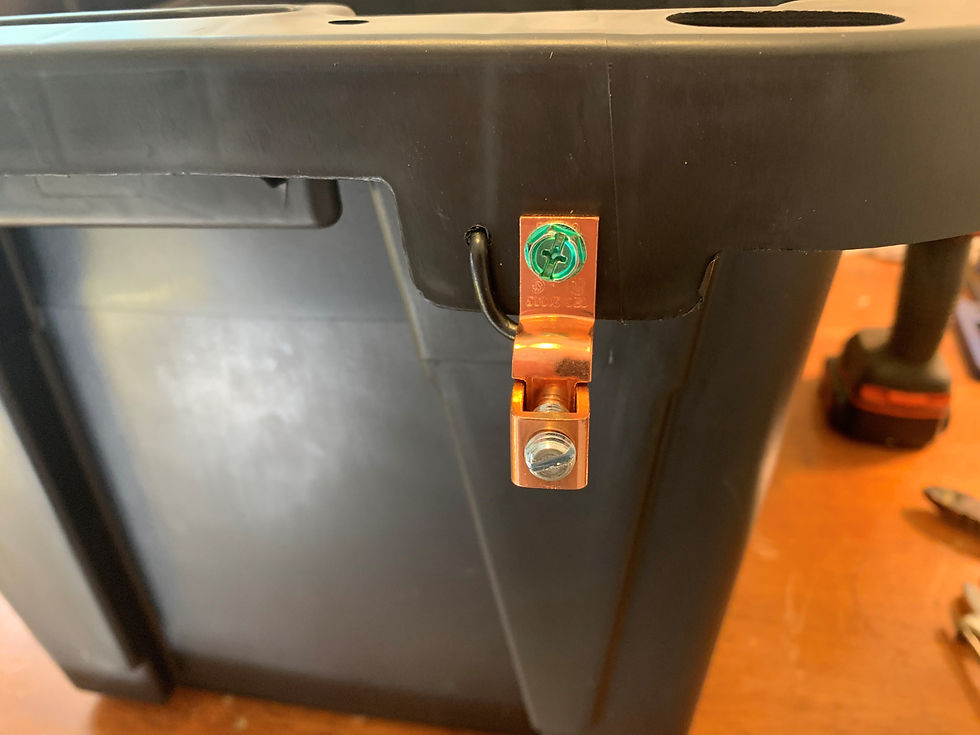
Once the metal was in place, I connected the two pieces of sheet metal by drilling a hole in two of the close corners and attaching the metal by the use of 2 of the ring terminals, a pair of the grounding screws and nuts, and a short length of the primary wire. This wire was routed out of the tote as it left one sheet and rerouted back into the tote to connect with the other sheet. A cable clamp under the exterior lip of the tote keeps that short bit of wire out of site. The metal then needed an exterior attachment for the positive end of the battery charger. To that end, another short bit of wire was routed from one of the short angles of the sheet metal, by way of another screw and ring terminal, out of a hole in one of the handled ends of the tote. On the end of the tote where my wire was now passing, I set up the two terminal lugs. In most DYI set ups, the clamps from the battery charger are simply hooked to the rebar, but I wanted a cleaner look, and the terminal lugs worked perfectly. These were attached to two extended lips on the handled end of the tote, and I wired my positive wire from the plates to what would be my positive terminal.


Now that the positive end of my system was complete, I set up the negative end, which is where the axe heads would reside. Since I wanted 3 individual terminals for separate axes, the set up became more complex than others I had seen. To be able to turn off the flow of electricity to any unused attachment sites, I installed the 3 toggle switches on the end of the tote between the two terminal lugs. From the negative terminal lug, I ran a small piece of primary wire to each switch, and from each of the switches a longer piece of wire was attached, with each piece being long enough to pass into the tote to a corresponding location where my axe heads would be located. These wires were passed through wall of the tote in recesses cut out for the attachment of the curtain rod. The closet rod, or a portion of it, was shortened to fit the length of the tote. Recesses were cut into the lid and the tote to allow the closet rod to rest securely on the lid of the tote. This rod would not only serve to hide the wiring, but is also where the axe heads would hang into the solution. Holes were drilled into the rod and the wires were passed through, exiting into 2” holes drilled into the lid of the tote. Clamps were then attached to each wire for connecting to the axe heads to be cleaned.
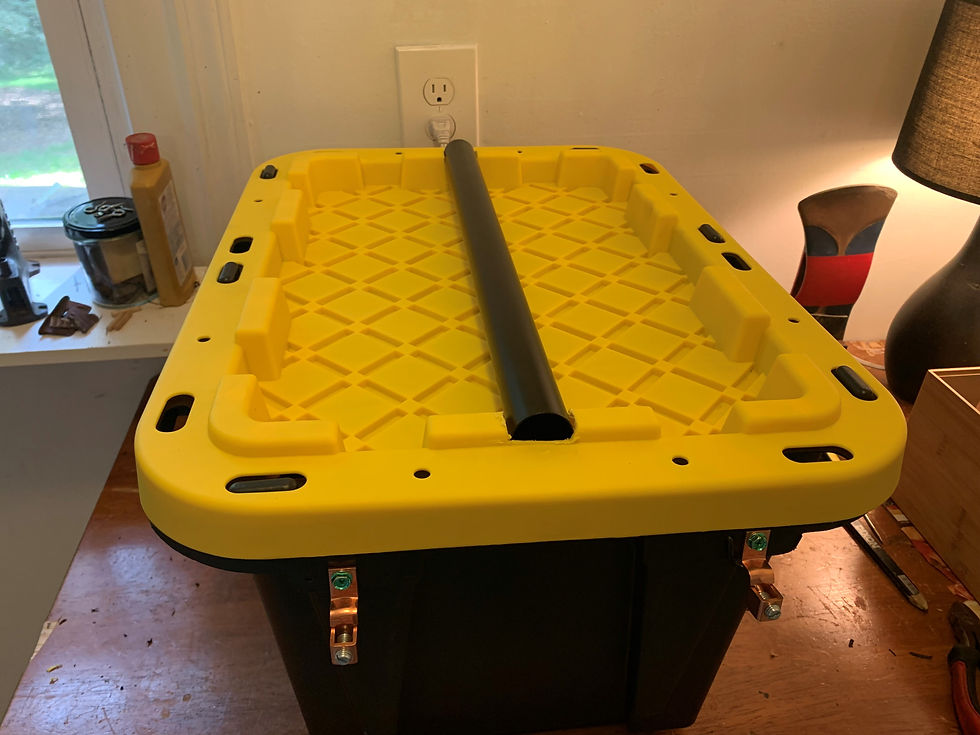


Though there is minimal danger of explosion if this type of set up is kept well ventilated, I drilled more 2” holes in the lid to allow for ample escaping of gases. Despite the holes, it’s interesting to note that much of the hydrogen gas that escapes this set up is temporarily trapped in foamy bubbles on the surface of the solution. Due to this, along with ventilation of both the toe and the space in which the device is used, care should be taken not to smoke or otherwise cause sparks in the area. Once all of the parts were wired together, it was time to fill the tote with solution. After some research, a general rule of thumb for the addition of the Washing Soda/Sodium Carbonate seems to be approximately 1 tablespoon of soda per gallon of water. I added about 10 gallons of water to the tote, filling it to about an inch below the screw holes holding the steel plates to the tote. This allowed for displacement of the solution due to large axe heads being lowered in. I then added 10 tablespoons of Washing Soda and stirred to let it dissolve. The next addition was the simplest, and that was the electricity. From a general survey of all of the DIY sources on the net, a manual 12-volt battery charger seemed the best solution. An older style, manual charger is needed, as the newer “smart” chargers with power off if used in this type of set up. I read through many options for automatic chargers with batteries attached (to trick that “smart” programming) and even old computer power sources modified for use in this system, and decided a second hand 12-volt charger would be the “cleanest” route to achieving my needs. There were a number of options for used manual chargers on eBay, and I was able to get a “in box” Diehard one for less than $50 shipped to my door. Attachment to the set up was simple as attaching the negative clamp to the axe head end of the system at the terminal post, and the positive clamp to the steel plate end’s terminal post. After plugging the charger in, no charge is noted in the system until at least one axe head is in the solution and its corresponding toggle switch is activated.
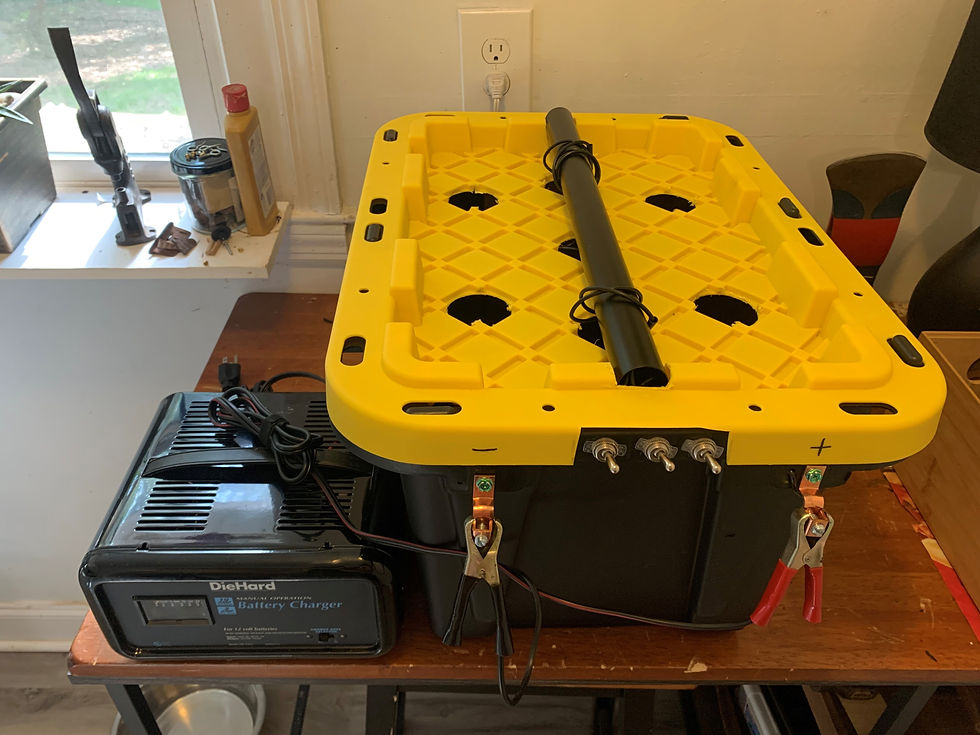

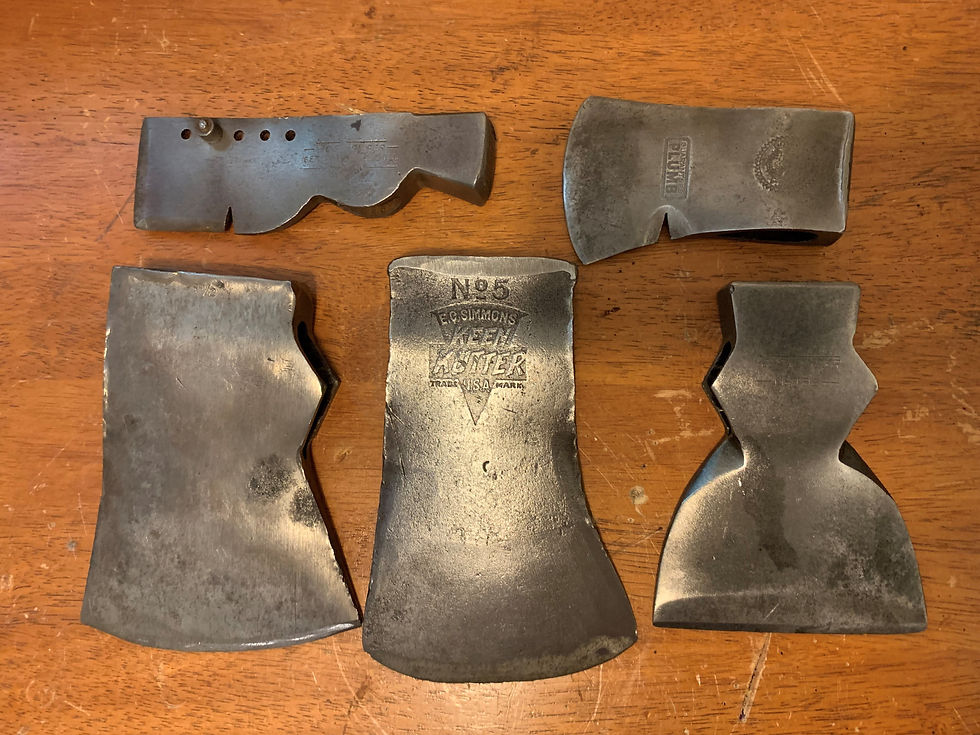
Adding the axe heads, due to the specifics of this construct, is quite easy. I decided to use 24” “Beaded Cable Wraps” as these were not conductive and they are reusable. To use them to support the heads, they are simply threaded through the eye, pushed up through the lid of the tote, and attached around the closet rod. The clamp for connection at that location is then simply clipped to the axe head, and the head is submerged into the solution. The battery charger is then plugged in, the toggle switch activated, and the magic of chemistry begins! My first batch of 3 heads, and a subsequent batch of 2 heads, each showed excellent results. After the past 2 years of scrubbing heads with a steel cup brush, de-rusting with a brass wire wheel, 3 in 1 oil baths, and the occasional vinegar soak, I can definitely say that electrolysis has a distinct advantage, as the heads look crisp, shiny finish afterwards, with much less physical exertion. I can only see this as a benefit to those looking to preserve what is left of the historic nature of vintage axe heads.

Comments